How to Clean Painted Walls and Trim Without Damaging Them
Clean painted walls and trim by sheen, from flat to gloss: dust first, test a spot, use mild soap, handle scuffs and grease, and know when to skip the magic eraser.
The short answer
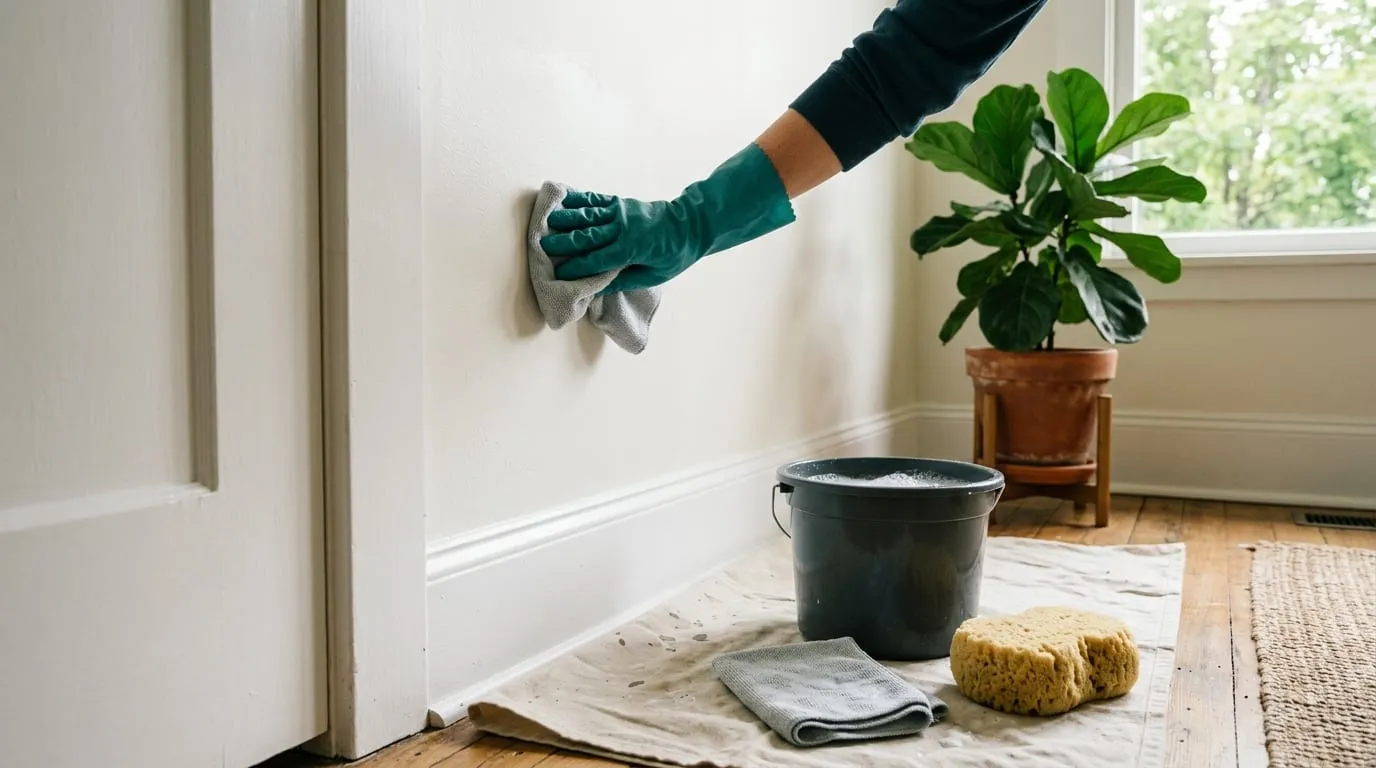
Dust painted walls first, then clean with a soft sponge or cloth and plain warm water, moving to warm water with a little mild dish soap only if needed. Work gently, wring the cloth well, rinse, and dry. Flat, matte, and eggshell paints need the lightest touch; satin, semi-gloss, and gloss tolerate more. Test any cleaner in a hidden spot first, and treat abrasive tools like melamine sponges as a last resort.
- Know your sheen. Paint makers say higher-sheen paints are easier to clean, and flat, matte, and eggshell need a gentler touch.
- Dust first with a vacuum brush or dry cloth, then start with plain warm water and add mild dish soap only if needed.
- Wring the cloth well, wash gently in small sections, rinse, and dry. Too much water and too much rubbing both damage paint.
- Melamine sponges are abrasive. Their maker says to test with light pressure and lists satin and high-gloss surfaces as not recommended, and abrasive cleaning causes shiny burnished patches on flat paint.
- In a home built before 1978, wipe painted surfaces gently with a damp cloth. EPA advises against abrasive cleaners and against sanding damaged paint dry.
Most painted walls need far less than people give them. Dust them, wipe them with a damp soft cloth, and add a little mild dish soap only when water is not enough. The skill is matching your pressure to the paint’s sheen, testing anything new in a hidden spot, and knowing which tools quietly damage a finish. This guide covers cleaning by sheen, scuffs and crayon, kitchen grease, trim and doors, melamine sponges, and what changes in a home built before 1978.
This is about ongoing care of walls you live with. If you are cleaning walls for a move-out inspection, our sister publication covers that standard in its apartment move-out cleaning checklist.
Start by knowing your sheen
Paint sheen is how much light the dried paint reflects. It matters for cleaning because the two big paint makers agree on the basic rule. Benjamin Moore: “Generally speaking, the higher the gloss or sheen, the easier it is to clean,” while “lower sheens like flat, matte, and eggshell require a gentler touch.” Sherwin-Williams says flat and matte finishes are less durable than satin or semi-gloss, “meaning you’ll want to avoid scrubbing too hard.”
That is also why paint makers put different sheens in different places. Sherwin-Williams’ sheen guide describes semi-gloss as “great for trim and moldings” and easy to clean, recommends it for kitchens and bathrooms, and suggests gloss and high gloss for trim, doors, and cabinets. So in many homes the walls are a lower sheen and the trim is higher, and they should be cleaned differently.
How to tell what you have
- Check the can. Leftover paint in the basement or garage is the best evidence. The label names the sheen.
- Look at a low angle. Stand to one side and look along the wall toward a window. Flat paint looks chalky and absorbs light. Eggshell shows a faint glow. Satin has a soft sheen. Semi-gloss and gloss reflect a clear, bright band of light.
- When unsure, assume flat. Cleaning a satin wall gently costs you nothing. Scrubbing a flat wall hard can leave a permanent shiny patch.
The sheen-by-method table
This table pulls the manufacturer guidance into one place. Treat “can tolerate” as permission to do a little more, not as permission to scrub.
| Sheen | Where it is common | Routine cleaning | Spot cleaning | Avoid |
|---|---|---|---|---|
| Flat | Ceilings, living and dining rooms, many rentals | Dust; plain warm water on a well-wrung soft sponge | Dab, do not rub; dish soap solution; rinse | Scrubbing, abrasive pads, melamine sponges, heavy pressure |
| Matte | Living areas, bedrooms | Dust; warm water, then mild dish soap if needed | Gentle circular motion, light pressure | Abrasives; repeated rubbing on one spot |
| Eggshell | Bedrooms, living areas, hallways | Dust; mild dish soap solution | Baking soda paste for scuffs, tested first | Strong solvents, scouring pads |
| Satin | Hallways, kids’ rooms, family rooms | Mild dish soap solution | Baking soda paste or a mild all-purpose cleaner, tested first | Melamine sponges (Mr. Clean lists satin as not recommended) |
| Semi-gloss | Trim, doors, kitchens, bathrooms | Mild dish soap solution; grease-cutting dish soap near the stove | Firmer wiping with a soft cloth | Abrasive powders and pads, which can dull the shine |
| Gloss and high gloss | Trim, doors, cabinets | Mild dish soap solution | Soft cloth, a little more pressure | Melamine sponges (listed as not recommended for high gloss), scouring pads |
All sheens: dust first, test in a hidden spot, wring the cloth out, rinse, and dry. Benjamin Moore warns never to use glass cleaner or heavy-duty household spray cleaners on painted walls, because their strong solvents can damage the finish.
Step 1: Dust before you wash
Washing a dusty wall turns dust into streaky mud. Sherwin-Williams says that regardless of paint type or sheen, regular dusting is in order: run the dust brush attachment of your vacuum over walls and ceilings, or wipe with a tack cloth or cheesecloth. A dry microfiber cloth or a duster on an extension pole also works.
Pay attention to the top of the baseboard, the tops of door frames and window casings, and the corners near the ceiling where cobwebs collect. In many homes, dusting alone handles most of what looks like dirty walls.
Step 2: Test a hidden spot
Before using anything other than plain water, test it. Sherwin-Williams suggests picking an inconspicuous spot and checking it after it dries: “You’re good to go if the paint still looks bright and no water marks remain.” Good test spots are behind a door, inside a closet, or a section of wall that a sofa hides.
Test the tool as well as the cleaner. A soft cloth and a melamine sponge leave very different results with the same soap.
Step 3: Wash gently, from the bottom up
What you need
- Two buckets: one for washing solution, one for clean rinse water
- Soft, non-abrasive sponges or microfiber cloths
- Warm water and a mild dish soap
- Old towels along the baseboard to catch drips
- A dry, soft towel for drying
The method
- Start with plain warm water. Benjamin Moore calls plain water one of the best cleaning agents and suggests trying it first on lighter marks.
- If water is not enough, add a little mild dish soap. A few drops in a bucket of warm water is plenty. More soap means more rinsing.
- Wring the sponge or cloth until it is just damp. Sherwin-Williams cautions that too much water can hurt the paint.
- Wash from the bottom up. Benjamin Moore recommends starting at the bottom so drips do not run down over dry, dirty paint and leave streaks.
- Work in small sections with light, circular motions. Let the solution do the work. Do not scrub.
- Rinse as you go with a cloth from the clean-water bucket, also well wrung.
- Dry with a soft towel. Benjamin Moore notes that drying the wall helps prevent moisture damage or mildew.
Change the rinse water when it looks cloudy. Dirty rinse water redeposits a film.
Freshly painted walls
Both brands say to wait at least two weeks after painting before washing, and Benjamin Moore’s guide to freshly painted surfaces says full cure takes about 30 days. If something spills before then, blot it with a damp cloth and leave it.
Scuffs, crayon, and fingerprints
Most marks on walls are surface marks, not stains, and they come off with patience.
- Fingerprints and hand marks around light switches and door edges are skin oil. The mild dish soap solution handles them. Wipe, rinse, dry.
- Scuffs from shoes, bags, and furniture: Sherwin-Williams suggests a paste of baking soda and water, rubbed gently over the mark, then rinsed with a sponge and dried with a soft cloth. Test it first, especially on flat and matte paint, because a paste is mildly abrasive.
- Crayon is waxy. Start with the dish soap solution on a soft cloth and gentle pressure, then try the baking soda paste on a tested spot if it remains. Benjamin Moore suggests a mild all-purpose cleaner for tougher stains, used according to its label and never combined with another product.
- Pencil and pen follow the same ladder: water, then soap, then a tested all-purpose cleaner.
If a mark will not come off after two or three gentle passes, stop. Rubbing harder is how walls get burnished. A small touch-up with the original paint is often the better fix.
Melamine sponges: useful, abrasive, and easy to overuse
Melamine foam sponges, sold most famously as Mr. Clean Magic Eraser, are popular for scuffs because they work fast. They work fast because they abrade.
What the manufacturer itself says, on its page about scuff marks on walls:
- “Test a small area with light pressure before use.”
- Not recommended for “high gloss, polished, dark, brushed, satin, faux” surfaces, along with bare or polished wood and several others.
- Do not use with chlorine bleach or other household cleaners.
What paint makers say about abrasive cleaning: Benjamin Moore and Sherwin-Williams both list frequent washing and spot cleaning with an abrasive cleaner as a cause of burnishing, the shiny patches that appear when repeated rubbing raises (or lowers) a paint’s sheen. Both say it often happens with flat paint in high-traffic areas. Benjamin Moore’s guide to freshly painted walls says to avoid “abrasive sponges like Magic Erasers and scouring pads.”
Put together, the practical rule is:
- Try water, then soap, then a baking soda paste first.
- If you still want to use a melamine sponge, test it in a hidden spot with light pressure and look at the result in daylight once dry.
- Do not use one on dark colors, satin, or high-gloss paint, per the maker’s own list.
- On flat and matte paint, expect a risk of a shiny patch even with light pressure.
- Use it on the mark only, not the surrounding wall, and stop after a few passes.
Grease and kitchen walls
Walls near the range collect a thin film of cooking grease that grabs dust and turns tacky. Sherwin-Williams suggests a grease-cutting dishwashing soap mixed in warm water for hard-to-remove stains like grease splatters on kitchen walls, and says to follow the label to make sure the cleaner will not harm your finish.
- Work on a warm wall if you can, after cooking rather than on a cold morning, since grease softens with warmth.
- Use a fresh cloth more often than you would elsewhere; a greasy cloth just moves grease around.
- Rinse well. Soap residue left on a kitchen wall attracts the next layer faster.
For range hoods, cabinet fronts, and backsplash grout, see our kitchen deep cleaning guide.
Trim, doors, and baseboards
Trim, doors, and door frames are usually painted in a higher sheen and handled far more than walls, so they need more frequent attention and tolerate more of it.
- Baseboards: vacuum with the brush attachment first, then wipe with the dish soap solution and a well-wrung cloth. Dry them, especially next to wood floors.
- Door edges and around handles: the dirtiest painted surfaces in most homes. Wipe them with the soap solution every few weeks.
- Window trim and sills: in Seattle’s wet season, condensation pools on sills. Wipe it dry daily when it appears, and clean any small mildew spots promptly. Our guide to keeping a home clean in the rainy season covers condensation and mildew in more detail.
- Painted cabinets: Benjamin Moore recommends dabbing rather than scrubbing on painted cabinets and testing first in a hidden area.
Older homes: the lead paint caution
This section matters more in Seattle than in many cities, because much of the housing stock is older. If your home was built before 1978, EPA says it is more likely to have lead-based paint, and that dust and chips from that paint are one of the most common sources of lead exposure at home.
EPA’s guidance for homes that have or may have lead-based paint changes the cleaning approach:
- Wipe gently with a damp sponge, cloth, or paper towel. EPA says to wipe hard surfaces such as window sills and door jambs this way.
- No abrasives. EPA says: “Do not use steel wool, scouring pads or abrasive cleaners,” and “Do not excessively rub spots to remove spots or stains.” That rules out melamine sponges and baking soda scrubbing on paint that may contain lead.
- Peeling or chipping paint: EPA says to clean the area immediately with a wet cloth, wipe, or sponge, and to pick up chips carefully with a damp paper towel. Do not dry sweep paint debris.
- Repairs: EPA advises fixing small areas (under 6 square feet) of damaged paint as soon as possible without sanding, and “If you must sand, wet the area first.” Its Renovate Right pamphlet says certified contractors are prohibited from open flame burning, using heat guns above 1100°F, and power sanding without a shroud and HEPA vacuum attachment, and may mist areas with water before sanding or scraping.
Practically: if you live in an older home and see chipping, chalking, or cracking paint on windows, doors, or stairs, do not scrape or sand it dry, and consider testing. EPA suggests hiring a certified lead-based paint inspector or risk assessor to find out whether your home has lead-based paint. For lead dust on floors, see the older-homes section of our guide to cleaning floors in a wet climate.
Worked example: a scuffed hallway in a 1920s house (illustrative)
This is an illustrative scenario, not a test. Consider a Craftsman house built in the 1920s with a narrow hallway painted in a flat warm white, white semi-gloss trim, and original window casings. The hallway has shoe scuffs at ankle height, fingerprints by the light switch, and a few grayish marks where a bike handlebar rubs.
- Assume lead on the original trim and windows. The house predates 1978, and the window casings have never been stripped. Those surfaces get damp wiping only, no abrasives.
- Dust everything with the vacuum brush: walls, baseboard tops, door frame tops.
- Test plain warm water, then the dish soap solution, on the wall behind the coat rack. After it dries, the flat paint looks even.
- Walls: wipe the fingerprints and scuffs with the soap solution, bottom up, small sections, light pressure, then rinse and dry. Most of the shoe scuffs lift. Two do not.
- Stubborn scuffs: the residents stop rather than scrub. On flat paint, a shiny patch would be more visible than the scuff. They note the spots for a touch-up with the leftover can.
- Trim: the semi-gloss baseboards get the same soap solution with slightly firmer wiping, then rinse and dry. The original window casing is wiped with a damp paper towel only.
- Prevention: a hook moves the bike off the wall.
Total time: about 45 minutes for a hallway, most of it dusting and patient wiping.
How often to clean walls
There is no fixed schedule, but a reasonable pattern for most homes:
- Every few weeks: door edges, light switches, and handles.
- Monthly: baseboards and the most-touched trim. Our Seattle house cleaning guide fits this into a whole-house routine.
- Seasonally or yearly: a full dust and wash of walls in busy rooms, plus kitchen walls near the range.
- Right away: spills, grease splatters, and anything sticky.
When to call for help
Washing walls is time-consuming, and high walls, stairwells, and ceilings add ladder work. If you would rather hand it off, ask any cleaning service whether wall washing is part of a deep clean or an add-on, and tell them your paint sheens and the age of your home so they can choose methods to suit. For background on product types and the never-mix list, see cleaners, sanitizers, and disinfectants explained.
Common questions
How do I know what sheen my walls are?
Look along the wall toward a window or lamp. Flat and matte reflect almost no light; eggshell has a faint glow; satin has a soft sheen; semi-gloss and gloss look visibly shiny. If you have leftover paint, the can label names the sheen, which is the most reliable answer.
Can I use vinegar or a spray cleaner on painted walls?
Paint makers start with plain water and mild dish soap, and Benjamin Moore specifically warns against glass cleaner and heavy-duty household sprays because their solvents can damage the finish. If you want to try anything stronger, test it in a hidden spot first and never mix products.
How soon can I wash a wall after painting?
Sherwin-Williams and Benjamin Moore's general wall guide say to wait at least two weeks. Benjamin Moore's guide to freshly painted walls and cabinets says full cure takes about 30 days. Before then, only blot spills gently with a damp cloth.
Why does one spot on my wall look shinier than the rest?
That is usually burnishing: repeated rubbing or washing, especially with an abrasive, polishes a low-sheen paint. Sherwin-Williams says the best fix is to repaint, ideally with a durable, higher-sheen paint, and Benjamin Moore's prevention advice is non-abrasive cleansers on a soft cloth or sponge.
Sources and references
- How to Clean Walls Without Damaging Paint , Benjamin Moore Primary source Accessed November 15, 2026
- How to Clean and Maintain Freshly Painted Walls and Cabinets , Benjamin Moore Primary source Accessed November 15, 2026
- How to Fix Paint Burnishing , Benjamin Moore Primary source Accessed November 15, 2026
- How to Clean Painted Walls , Sherwin-Williams Primary source Accessed November 15, 2026
- How to Clean Newly Painted Walls (PDF) , Sherwin-Williams Primary source Accessed November 15, 2026
- How to Fix Paint Marring , Sherwin-Williams Primary source Accessed November 15, 2026
- How to Choose Paint Finishes , Sherwin-Williams Primary source Accessed November 15, 2026
- How to Get Scuff Marks off Walls , Mr. Clean (Procter & Gamble) Primary source Accessed November 15, 2026
- Reduce the Risk of Lead Exposure at Home , U.S. Environmental Protection Agency Primary source Accessed November 15, 2026
- The Lead-Safe Certified Guide to Renovate Right (PDF) , U.S. Environmental Protection Agency Primary source Accessed November 15, 2026
See something out of date or wrong? Tell the editors. Read how we work in our editorial policy.